Building an MCP with the Official TypeScript SDK in Node.js
What are we building?
We are going to build a MCP server that will manage projects and tasks. Let's call it "Task Manager".
It will have the following capabilities:
Tools
- Create Project
- List Projects
- Add Task
- List Tasks
- Complete Task
Resources
- Projects
- Tasks by Project
Prompts
- Plan Next Steps
For data persistence, we will use a Redis database (Heroku Key-Value Store) just as a simple example but you can use any other database you like.
INFO
ℹ️ You can download the code from the GitHub repository and skip the next steps but it's recommended to follow the steps to understand the code and how to build an MCP server.
Create a new Node.js project
Let's create a new directory for our MCP server and initialize it as a Node.js project.
mkdir mcp-task-manager
cd mcp-task-manager
npm init -y
Install the dependencies
Inside the project directory, let's install the required dependencies, we will use the @modelcontextprotocol/sdk for the MCP server, zod@3 for the schema definitions, ioredis for the Redis database, slugify for the slug generation, dotenv for the environment variables and express for the HTTP transport server.
npm install @modelcontextprotocol/sdk zod@3 ioredis slugify dotenv expressInstall the development dependencies
We will also install the development dependencies, we will use the @modelcontextprotocol/inspector for testing the MCP server locally with the MCP Inspector.
npm install -D @modelcontextprotocol/inspector @types/express @types/node concurrently tsx typescriptSetup TypeScript
Create a new tsconfig.json file in the root of the project.
touch tsconfig.jsonAdd the following content to the tsconfig.json file.
tsconfig.json
{
  "compilerOptions": {
    "target": "ES2022",
    "module": "CommonJS",
    "moduleResolution": "node",
    "rootDir": "./src",
    "outDir": "./dist",
    "strict": true,
    "esModuleInterop": true,
    "forceConsistentCasingInFileNames": true,
    "skipLibCheck": true
  },
  "include": ["src/**/*.ts"],
  "exclude": ["dist", "node_modules"]
}
Create the Storage Service
We will create a storage service that will handle the data persistence for our MCP server.
mkdir src
touch src/redis.ts
Add the following content to the src/redis.ts file.
// src/redis.ts
import Redis from "ioredis";
import slugify from "slugify";

let client: Redis;

export function getRedisClient(): Redis {
  if (!client) {
    const url = process.env.REDIS_URL;
    if (!url) throw new Error("REDIS_URL is not set");
    client = new Redis(url, {
      lazyConnect: true,
      maxRetriesPerRequest: 1,
      tls: { rejectUnauthorized: false },
    });
  }
  client.on("error", (err) => {
    console.error("Redis error:", err);
  });
  return client;
}

export async function ensureRedis(): Promise<void> {
  const r = getRedisClient();
  if (r.status !== "ready") {
    await r.connect();
  }
  // simple health check
  await r.ping();
}

export async function createProject(name: string) {
  const r = getRedisClient();
  const id = slugify(name, { lower: true, trim: true, strict: true });
  const createdAt = new Date().toISOString();
  await r.hset(`project:${id}`, { id, name, createdAt });
  await r.sadd("project:index", id);
  return { id, name, createdAt };
}

export async function getProject(id: string) {
  const r = getRedisClient();
  const project = await r.hgetall(`project:${id}`);
  if (!project || !project.id) throw new Error("Project not found");
  return project;
}

export async function listProjects() {
  const r = getRedisClient();
  const ids = await r.smembers("project:index");
  const pipe = r.pipeline();
  ids.forEach((id) => pipe.hgetall(`project:${id}`));
  const rows = await pipe.exec();
  return (rows ?? []).map(([, v]) => v).filter(Boolean);
}

export async function addTask(projectId: string, title: string) {
  const r = getRedisClient();
  const pid = `project:${projectId}`;
  const exists = await r.exists(pid);
  if (!exists) throw new Error("Project not found");

  const id = slugify(title, { lower: true, trim: true, strict: true });
  const createdAt = new Date().toISOString();
  await r.hset(`task:${id}`, {
    id,
    projectId,
    title,
    done: "false",
    createdAt,
    completedAt: "",
  });
  await r.rpush(`project:${projectId}:tasks`, id);
  return { id, projectId, title, done: false, createdAt };
}

export async function listTasks(projectId: string) {
  const r = getRedisClient();
  const ids = await r.lrange(`project:${projectId}:tasks`, 0, -1);
  if (ids.length === 0) return [];
  const pipe = r.pipeline();
  ids.forEach((id) => pipe.hgetall(`task:${id}`));
  const rows = await pipe.exec();
  return (rows ?? [])
    .map(([, v]) => v)
    .filter(Boolean)
    .map((t: any) => ({
      id: t.id,
      projectId: t.projectId,
      title: t.title,
      done: t.done === "true",
      createdAt: t.createdAt,
      completedAt: t.completedAt || null,
    }));
}

export async function completeTask(projectId: string, taskId: string) {
  const r = getRedisClient();
  const key = `task:${taskId}`;
  const task = await r.hgetall(key);
  if (!task || !task.id) throw new Error("Task not found");
  if (task.projectId !== projectId) throw new Error("Project mismatch");
  const completedAt = new Date().toISOString();
  await r.hset(key, { done: "true", completedAt });
  return {
    id: taskId,
    projectId,
    title: task.title,
    done: task.done === "true",
    createdAt: task.createdAt,
    completedAt,
  };
}
INFO
ℹ️ The REDIS_URL will be set in the environment variables (.env) for local development
Let's provision a Redis database on Heroku and get the configuration url.
First we need to create a new Heroku application.
heroku create <username>-mcp-task-manager --team <team-name>INFO
ℹ️ The username is a unique identifier for your Heroku application and the team-name is the one provided by the instructor in the workshop invite.
Then we need to provision a Redis database.
heroku addons:create heroku-redis:mini -a <username>-mcp-task-managerThen we need to get the configuration url and store it in the .env file.
heroku config -s -a <username>-mcp-task-manager > .envTIP
💡 To set the app-name as default, you can initialize this project as a git repository and run heroku git:remote -a <username>-mcp-task-manager
Create the Schema definitions
We will create the schema definitions for the tools and prompts, we will use the Zod library to define the schemas.
touch src/schema.ts// src/schema.ts
import { z } from "zod";
export const CreateProjectInput = {
name: z.string().min(1),
};
export const CreateProjectOutput = {
project: z.object({
id: z.string(),
name: z.string(),
createdAt: z.string(),
}),
};
export const ListProjectsOutput = {
projects: z.array(
z.object({
id: z.string(),
name: z.string(),
createdAt: z.string(),
})
),
};
export const AddTaskInput = {
projectId: z.string().min(1),
title: z.string().min(1),
};
export const AddTaskOutput = {
task: z.object({
id: z.string(),
projectId: z.string(),
title: z.string(),
done: z.boolean(),
createdAt: z.string(),
}),
};
export const ListTasksInput = {
projectId: z.string().min(1),
};
export const ListTasksOutput = {
tasks: z.array(
z.object({
id: z.string(),
projectId: z.string(),
title: z.string(),
done: z.boolean(),
createdAt: z.string(),
completedAt: z.string().nullable().optional(),
})
),
};
export const CompleteTaskInput = {
projectId: z.string().min(1),
taskId: z.string().min(1),
};
export const CompleteTaskOutput = {
task: z.object({
id: z.string(),
projectId: z.string(),
title: z.string(),
done: z.boolean(),
createdAt: z.string(),
completedAt: z.string().nullable().optional(),
}),
};
export const NextStepsInput = {
projectId: z.string().min(1),
};Create the MCP Server
We will create the MCP server that will handle the requests and responses for our Task Manager, we will add support to both STDIO and Streamable HTTP transports.
touch src/index.tsLet's start with the imports and then we will define the MCP server, its tools, resources and prompts and finally the http and stdio transports.
// src/index.ts
import "dotenv/config";
import express, { type Request, type Response } from "express";
import {
  listProjects,
  addTask,
  listTasks,
  completeTask,
  ensureRedis,
  createProject,
  getRedisClient,
  getProject,
} from "./redis.js";
import {
  AddTaskInput,
  AddTaskOutput,
  CompleteTaskInput,
  CompleteTaskOutput,
  CreateProjectInput,
  CreateProjectOutput,
  ListProjectsOutput,
  ListTasksInput,
  ListTasksOutput,
  NextStepsInput,
} from "./schema.js";

// MCP SDK
import {
  McpServer,
  ResourceTemplate,
} from "@modelcontextprotocol/sdk/server/mcp.js";
import { StdioServerTransport } from "@modelcontextprotocol/sdk/server/stdio.js";
import { StreamableHTTPServerTransport } from "@modelcontextprotocol/sdk/server/streamableHttp.js";
Now let's define the MCP server and its metadata.
// src/index.ts
async function buildMcpServer() {
  const server = new McpServer({
    name: "task-manager",
    description:
      "Project and task management MCP server, use it to create projects, add tasks, list tasks, complete tasks, and plan next steps.",
    version: "1.0.0",
  });

  // Tools

  // Resources

  // Prompts

  return server;
}
Each tool will be defined as a function that will return a promise with the result of the tool execution, it will receive the input as a parameter and will return the output following the schema definition with both text content and structured content.
Let's define the create-project tool.
// src/index.ts - buildMcpServer function
server.registerTool(
  "create-project", // Tool name
  {
    title: "Create Project", // Tool title
    description: "Creates a new project", // Tool description - this will be used to describe the tool to the LLM
    inputSchema: CreateProjectInput, // Tool input schema - this will be used to validate the input of the tool
    outputSchema: CreateProjectOutput, // Tool output schema - this will be used to validate the output of the tool
  },
  async ({ name }) => {
    // Let's' call the storage service to create the project
    const project = await createProject(name);

    // We will return the output of the tool with the text content and the structured content
    return {
      content: [
        {
          type: "text",
          text: `Project created: ${JSON.stringify(project)}`,
        },
      ],
      structuredContent: {
        project,
      },
    };
  }
);
💡 Understanding the Tool Execution Response The response demonstrates MCP’s flexible content system:
contentArray: Tool responses return an array of content objects, allowing for rich, multi-format responses (text, images, resources, etc.)typefield: Each content object has a type field. In this example,type: "text"indicates plain text content, but MCP supports various content types for different use cases.structuredContentfield: The response provides actionable information that the AI application can use as context for language model interactions.
Let's define the rest of the tools, we will follow the same pattern for each tool.
// src/index.ts - buildMcpServer function
  server.registerTool(
    "list-projects",
    {
      title: "List Projects",
      description: "Lists all projects",
      outputSchema: ListProjectsOutput,
    },
    async () => {
      const projects = await listProjects();
      return {
        content: [
          { type: "text", text: `Projects: ${JSON.stringify(projects)}` },
        ],
        structuredContent: {
          projects,
        },
      };
    },
  );

  server.registerTool(
    "add-task",
    {
      title: "Add Task",
      description: "Adds a new task to a project",
      inputSchema: AddTaskInput,
      outputSchema: AddTaskOutput,
    },
    async ({ projectId, title }) => {
      const task = await addTask(projectId, title);
      return {
        content: [
          { type: "text", text: `Task added: ${JSON.stringify(task)}` },
        ],
        structuredContent: {
          task,
        },
      };
    },
  );

  server.registerTool(
    "list-tasks",
    {
      title: "List Tasks",
      description: "Lists all tasks for a project",
      inputSchema: ListTasksInput,
      outputSchema: ListTasksOutput,
    },
    async ({ projectId }) => {
      const tasks = await listTasks(projectId);
      return {
        content: [{ type: "text", text: `Tasks: ${JSON.stringify(tasks)}` }],
        structuredContent: {
          tasks,
        },
      };
    },
  );
Excercise: Define the complete-task tool
Define the complete-task tool following the same pattern as the other tools and using the completeTask function from the storage service.
Define the Resources
We will define two resources, one for the projects and one for the tasks by project.
// src/index.ts - buildMcpServer function
  server.registerResource(
    "projects",
    "projects://*",
    { title: "Projects", description: "List all available projects" },
    async () => {
      const projects = await listProjects();
      return {
        contents: [
          {
            text: `Projects:\n\n${projects
              .map(
                (project: any) =>
                  `- ${project.id} - ${project.name} (${project.createdAt})`,
              )
              .join("\n")}`,
            uri: "projects://*",
          },
        ],
      };
    },
  );

  server.registerResource(
    "project-tasks",
    new ResourceTemplate("tasks://{projectId}", { list: undefined }),
    { title: "Tasks by Project", description: "List all tasks for a project" },
    async (uri, { projectId }) => {
      console.error("projectId", projectId);
      console.error("uri", uri);
      const tasks = await listTasks(projectId as string);
      return {
        contents: tasks.map((task) => ({
          text: `Task: ${task.title} - ${task.done ? "Done" : "Not Done"}`,
          uri: uri.href,
        })),
      };
    },
  );
Define the Prompts
We will define a prompt that will be used to plan the next steps for a project.
// src/index.ts - buildMcpServer function
  server.registerPrompt(
    "next-steps",
    {
      title: "Plan Next Steps",
      description: "Helps the model plan next steps for a project",
      argsSchema: NextStepsInput,
    },
    async ({ projectId }) => {
      const project = await getProject(projectId);
      const tasks = await listTasks(projectId);
      const pending = tasks.filter((task) => !task.done);
      const done = tasks.filter((task) => task.done);

      return {
        messages: [
          {
            role: "user",
            content: {
              type: "text",
              text: `Help plan next steps for the following project: ${
                project.name
              }\n\nPending tasks:\n${pending
                .map((t) => `- ${t.title} (${t.id})`)
                .join("\n")}\n\nDone tasks:\n${done
                .map((t) => `- ${t.title}`)
                .join("\n")}\n\nSuggest next 3 steps.`,
            },
          },
        ],
      };
    },
  );
Create the HTTP Server
We will use the Express library to create the HTTP server to serve the MCP on the /mcp route.
Let's define the startHttp function.
async function startHttp() {
  const app = express();
  app.use(express.json());

  // Streamable HTTP Server MCP Endpoint
  app.post("/mcp", async (req: Request, res: Response) => {
    try {
      const transport = new StreamableHTTPServerTransport({
        sessionIdGenerator: undefined,
        enableJsonResponse: true,
      });

      res.on("close", () => {
        transport.close();
      });

      const server = await buildMcpServer();
      await server.connect(transport);
      await transport.handleRequest(req, res, req.body);
    } catch (error: any) {
      console.error("Error handling MCP request:", error);
      if (!res.headersSent) {
        res.status(500).json({
          jsonrpc: "2.0",
          error: {
            code: -32603,
            message: "Internal server error",
          },
          id: null,
        });
      }
    }
  });

  // Simple manual route to list all projects
  app.get("/projects", async (_req: Request, res: Response) => {
    const projects = await listProjects();
    res.json({ projects });
  });

  // Health check endpoint
  app.get("/health", async (_req: Request, res: Response) => {
    try {
      await getRedisClient().ping();
      res.json({ ok: true });
    } catch (e: any) {
      res.status(500).json({ ok: false, error: e?.message || String(e) });
    }
  });

  const port = Number(process.env.PORT || 3000);
  app.listen(port, () => {
    console.error(`HTTP listening on :${port}`);
    console.error(`MCP listening on http://localhost:${port}/mcp`);
  });
}
INFO
ℹ️ For the MCP server we just need the /mcp route that will serve Streamable HTTP Transport requests. The /health and /projects route are for convenience and not required for the MCP server.
Also, notice the console.error (stderr) messages. The stdio transport, as its name suggests, uses the standard input and output streams to communicate with the MCP client. So we use stderr to log messages to the console without interfering with the MCP client.
Define the main entrypoint
Now in the main entrypoint we will determine the mode to run in (stdio or http) and then we will build the MCP server and connect it to the transport.
// src/index.ts

(async () => {
  // Make sure Redis is connected and available
  await ensureRedis();

  // Determine the mode to run in (stdio or http) - Default to http
  const mode = process.argv[2]; // "stdio" or "http"
  if (mode === "stdio") {
    const server = await buildMcpServer();
    const transport = new StdioServerTransport();
    await server.connect(transport);
    console.error("MCP server (stdio) ready.");
  } else {
    await startHttp();
  }
})();
Test the MCP Server
And finally, we will run the server locally with the MCP Inspector to debug the MCP server locally.
Let's create configuration files for the MCP Inspector in HTTP and STDIO modes.
mcp.http.json
{
  "mcpServers": {
    "mcp-task-manager": {
      "type": "streamable-http",
      "url": "http://localhost:3000/mcp"
    }
  }
}
mcp.stdio.json
{
  "mcpServers": {
    "mcp-task-manager": {
      "type": "stdio",
      "command": "node",
      "args": ["dist/index.js", "stdio"]
    }
  }
}
Let's add the following scripts to the package.json file, for both building the project and running the server locally with the MCP Inspector.
  "scripts": {
    "dev:stdio": "tsx src/index.ts stdio",
    "dev:http": "tsx src/index.ts http",
    "build": "tsc -p .",
    "inspect": "npm run inspect:stdio",
    "inspect:http": "concurrently \"npm run dev:http\" \"npx @modelcontextprotocol/inspector --config mcp.http.json\"",
    "inspect:stdio": "npx @modelcontextprotocol/inspector --config mcp.stdio.json",
    "start": "node dist/index.js http"
  },
Everything should be ready to work, let's build the project by running npm run build and then we can run the server locally with the MCP Inspector by running npm run inspect.
npm run build
npm run inspect> mcp-task-manager@1.0.0 inspect /Users/jduque/work/dev/speaking/JSNation/mcp-task-manager
> npm run inspect:stdio
> mcp-task-manager@1.0.0 inspect:stdio
> npx @modelcontextprotocol/inspector --config mcp.stdio.json
Starting MCP inspector...
⚙️ Proxy server listening on localhost:6277
🔑 Session token: e1d6968a09c1b3d19517d0e3f02d678e634dd82da24c3fe9e2e3f235f8593400
Use this token to authenticate requests or set DANGEROUSLY_OMIT_AUTH=true to disable auth
🚀 MCP Inspector is up and running at:
http://localhost:6274/?MCP_PROXY_AUTH_TOKEN=e1d6968a09c1b3d19517d0e3f02d678e634dd82da24c3fe9e2e3f235f8593400
🌐 Opening browser...You'll see the MCP Inspector UI in your browser.
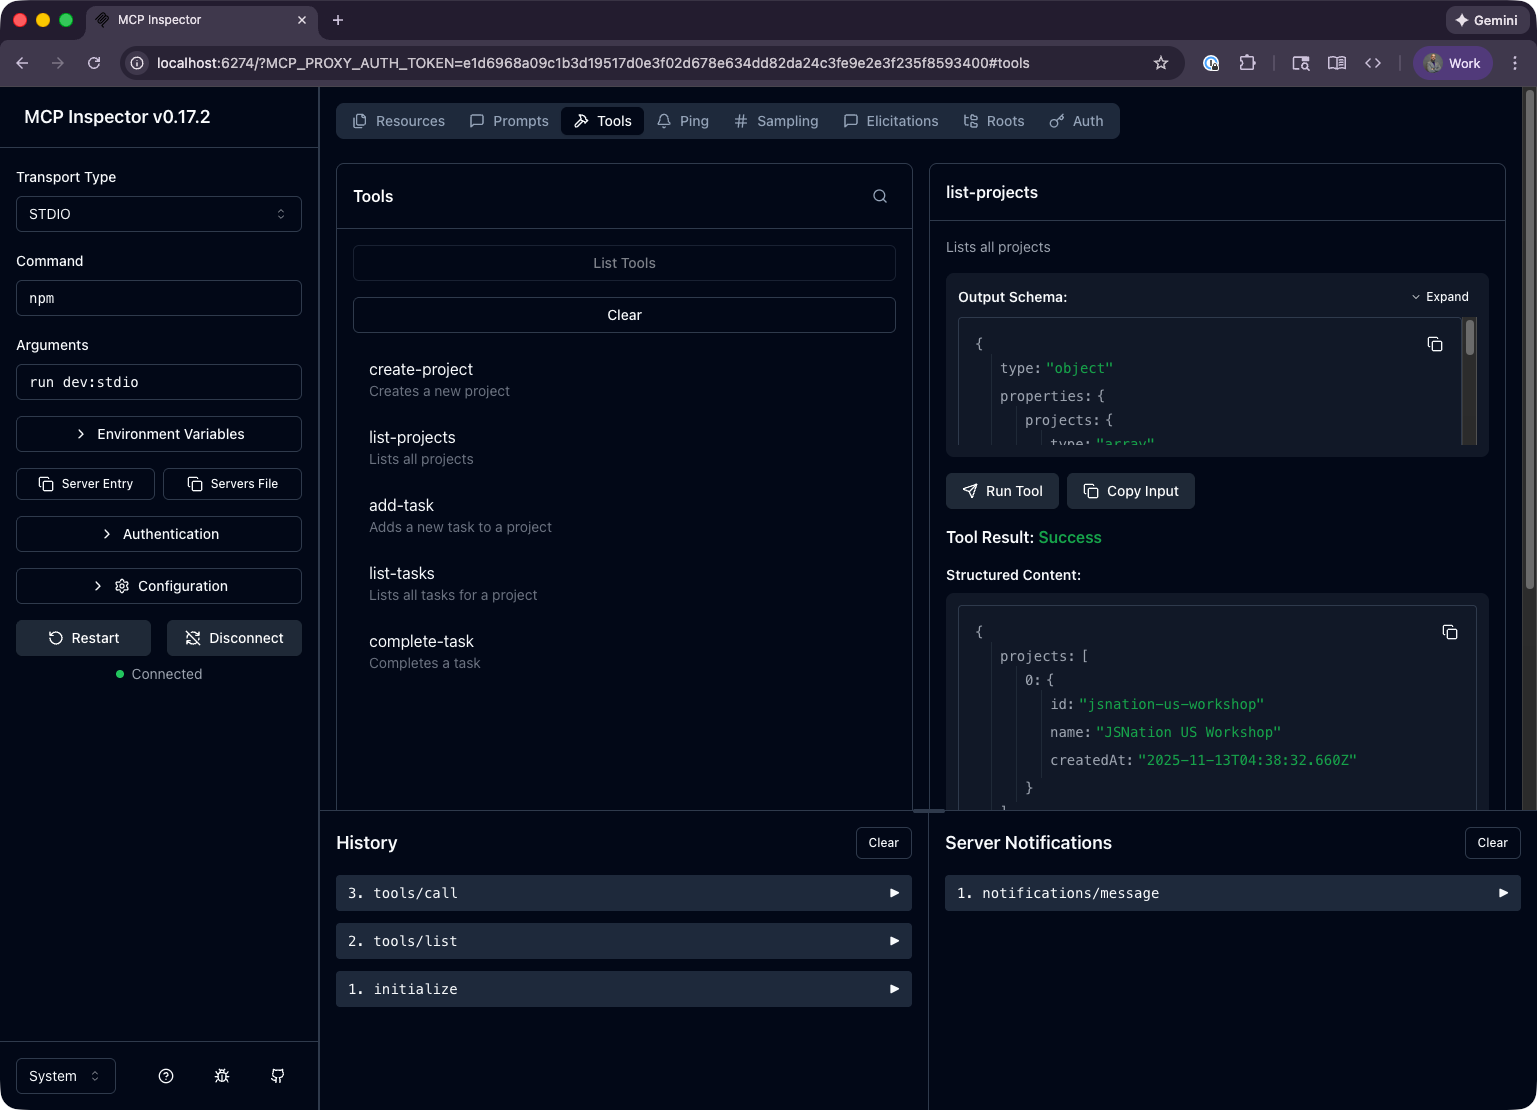
Feel free to navigate to the different resources, prompts, and tools and test if the MCP Server is working as expected.